Wednesday, April 27, 2011

Easy lamb cutlets & tabouleh...

As promised, here is another easy weeknight meal I cooked of late. I mentioned in my recent post about lamb cutlets that they are on the expensive side for us (and this is true), however I don't actually eat a lot of red meat other than cutlets, and they're so yummy... so sometimes its worth the splurge! 

Recently I found a lovely tray of cutlets that were just so nice looking and so lean, I could not pass them up! What to do with them? Cutlets with olives again? Tempting, but no... BBQ? No (Boofy had left the BBQ out in the rain and couldn't be bothered cleaning it! Lol) OK so they needed to be cooked inside in a pan... not my favourite way to cook meat, I much prefer BBQ (I'm very fussy with red meat, which is why I don't eat a lot of it).

I recalled that a couple of weeks ago when I was flicking for this cake recipe for Boofy's birthday, I came across a recipe for tabouleh and it briefly crossed my mind that I hadn't made it for ages! Its quick, easy and healthy if you make it yourself - so why not! So here is what I decided on:

EASY SPICED CUTLETS
Ingredients

Cutlets
Olive oil
Ground cumin
Ground coriander
Garam masala
Natural yoghurt to serve (or extra light sour cream if you prefer)

Method

If desired, bash your cutlets to flatten them a little (I would have done this… but my meat basher thingy has gone missing... No idea of its whereabouts!)

Mix together equal amounts of ground coriander and garam masala, and then put slightly more cumin than the others in. Put in only enough olive oil to make a dry-ish sort of paste and mix together. Rub the paste on the cutlets and cook in a non stick pan over a medium to high heat until done to your liking.

Note: I always put more cumin in than anything else because I'm totally addicted to it, but just do it to your taste… I have a thousand packets of ground cumin in the pantry at all times, because my personal opinion is that everything can be enhanced with cumin!! Lol… As an aside - the absolute best way to make a boring vegetable taste exciting and exotic is this… steam the vegetable in the microwave with cumin seeds and a little butter - this works especially well with things like zucchini, squash and choko which are cheap in season but don’t have a lot of flavour. I don't do that one for every night meals (can't justify putting butter on veges every night - eek!) but its nice if you're having a casual meal with friends and just want to tart it up a bit :)

So, onto the tabouleh. There are a million recipes for this - mine is the cheat's version, very plain, because I prefer it that way! I love the flavour of fresh herbs and I want to be able to taste them… Here is my recipe (of sorts!):

TABOULEH
Ingredients

2 decent size bunches of Continental Parsley
2 decent size bunches of Mint
4 small tomatoes
1 bag San Remo boil in the bag couscous
Lemon juice
Olive oil
Salt flakes

Method

Put the bag of couscous into a bowl and cover with boiling water. Leave for about 4 minutes, then empty water out, run under cold water and squeeze as much water out of the bag without burning yourself as you can! Dry off your bowl, split the bag and empty the couscous into the bowl. Give it a quick whip with a fork to separate it and wait for it to cool.

Chop the parsley and mint - I chop it fairly coarsely as I prefer it this way, but you can do it finely chopped if you prefer - throw together into a bowl. Cut tomatoes in half and scoop out seeds (if you are cooking anything in a tomato based sauce in the next couple of days, put in a container in the fridge to use for that). Finely and evenly dice the de-seeded tomatoes.

Combine the couscous with the herb mixture and give it a good stir to combine. Pour over a small amount of olive oil and equal amount (or slightly more) of lemon juice - I use lemon squeeze if I've got no lemons. Put in a generous pinch of salt flakes. Stir to combine and then taste - add more lemon juice, olive oil or salt if required. I don't like my tabouleh too oily so I tend to go really easy with the first splash - you can always add more but you can't take it out!

If you wanted to, you could put some chopped spring onions in your tabouleh too, but I don't personally like the taste of raw onion, so I leave it out - up to you.  This actually makes a huge amount of tabouleh (about 4 serves for us - we had it for dinner, then both of us had a generous amount for lunch the next day).  If you can cope with it for dinner 2 nights in a row, an even easier meal is to shred some BBQ chook through the tabouleh and serve with yoghurt - so yummy!  So this is the sort of amount we're talking about - this is quite a large bowl:


To serve, I put a tablespoon of natural yoghurt (or in this case light sour cream - that's what we had!) on the plate with a mint sprig, then a generous serve of tabouleh.  When the cutlets are cooked, add them to the plate too. 


You could also serve this with some microwaved pappadums, which are very low in fat and would be yummy with this flavour combination.

Bye for now :)

Home Shopping...

So you probably know by now, if you've read some of my other posts, that I am big on reading blogs.  Often on these blogs, people are showcasing recent Etsy purchases, which are always gorgeous and hand made...  I have bought some stuff of Etsy myself, namely some cute quilted coasters from btaylor quilts - I bought three different sets of 4 (one pictured below) but she has lots and lots of them


Buying from America is great value at the moment with the dollar the way it is - so if you find something on Etsy, now is definitely the time to buy!  But sometimes, because the sellers are based in the USA, the shipping costs of these items are prohibitive for us Aussies (although these coasters weren't - postage was very reasonable).  For this reason (and because the dollar was not as good as it is now!) about a year ago I decided to look for something a little closer to home... and that is when I stumbled upon madeit.  There are some wonderful (Australian) hand made items - some are reasonable, some are on the more expensive side, but I'm sure this just reflects the labour that went into creating them. Anyway, here are a few little gems I have my eye on at the moment...


These "Anita" Sparkly Crystal Briolet Earrings by Lisbon Sky are so cute - I love a bit of sparkle!


This gorgeous jewellery tree by Sage Design would look lovely in any bedroom I think (girly enough to be pretty, but not too girly that the husband would complain!)


This cute wonky flag bunting by The Wonky Tree would be lovely in a kids bedroom, or outdoors for a party


And how about this Doyles Restaurant vintage tile by The Travelling Tiles... a bit of nostalgia for you Sydney-siders :)


I am in love with all things owl-related (in fact I've been carting around a pair of jade owls from my family home since I left a bit under 20 years ago!  Not to mention several other owls around the place, and my son's whole bedroom... decorated in owls!)  So no surprise that I'm loving this fun little Owl Line Up in Green zip pouch by Odds and Blobs... I really need a toiletry bag as well though... so I have emailed Jess for a quote! If you're an owl officianado like myself, check out her site - she has LOTS of different owl patterns :)


It is taking all my willpower not to purchase this gorgeous satchel with crocheted flowers by Ruby Berry...   The only reason I'm not buying it is because I need another bag like a hole in the head - oh but its so cute!!!  Stop it Krispy... budget - stick to the budget!!  OK deep breaths!  And... moving on.

Actually part of the reason I cannot afford this beautiful bag, is because... well... I did already make a purchase!  It was about a quarter of the price of the bag, so I don't feel so bad... and the title of it was REDUCED! REDUCED!  How could I resist?  Also I feel like every day lately is a bad hair day (I've got to get a haircut!), and I've been using boring bobby pins to clip back my 'fringe' so hopefully they will make things a little more exciting :)


These vintage flower bobby pins (plus ring!) are by Nomstar - I've just snapped up the last ones in these colours, but I notice there are still a few in other colours on sale if anyone else has a burning desire to own some!

I hope you've enjoyed this little foray into madeit... it is another one of my happy places!  I dare say I'll post about this gorgeous little marketplace again... I'm always trawling through it for inspiration!

Bye for now :)

Monday, April 25, 2011

What Easter Sunday looks like...

What does Easter Sunday look like in our house?  It looks a lot like this...

After discovering that the Easter bunny had, in fact, eaten the carrots, cheese, sultanas and scotch finger biscuits left out for him (Alex's choice!) we set off on a treasure hunt using the map that the Easter bunny had left.  This resulted in one very excited boy with more chocolate than any 3 year old could possibly need! 


And also a non-chocolate haul of PJ's, a new ball, a book and some undies (not pictured!)

We all had some breakfast, then had some fun with Alex's new ball (to burn off some of the sugar in all that chocolate!)

Alex is in the process of dropping his day sleep, but still has a rest (without sleeping) at lunch time.  So while Daddy rested with Alex in our bed and watched Ratatouille (the current favourite around here), I was dreaming of finally getting motivated to do something with that table I bought off eBay for $5 back in January.  I dragged out the scrapbooking papers I wanted to use for the top of it to see what sort of patterns I had, then knocked up this very rough sketch of how I wanted it to look (this will probably not mean anything to anyone but me!)


Completion coincided with the time Alex was due to get out of bed, but I was just getting started... I had the idea that I really wanted to cut out the papers and paste them down to see how it looked, but I knew Alex would want to 'help' :)  So I got out 2 glue sticks, some spare A4 paper and the kiddies scissors, and pretty soon Alex and I were 'working' happily side by side at the desk


This worked really well for about an hour and a half , which was about 80 minutes longer than I thought it would last, so bonus for me!  And bonus for Boofy as well, since he got to sit quietly in the lounge room and watch Sea Biscuit (except for exclaiming in wonder over the occasional paper rocket gift!)  But we didn't stay looking quite so neat at my desk for too long... pretty soon the desk had morphed into this...


Somewhere along the way, Alex had decided that he needed the pillow off his bed and every cushion from the toy room, plus a couple of extra chairs, so his workstation looked like this...


But at least he was happy, and I had managed to produce my little diagram of how I hoped my coffee table might turn out...


You can see the previous post for more details on that... and I'd still love to receive any feedback you might have about the design (in your mind, picture it on a coffee table and let me know what you come up with)... I'm now leaning toward removing those four horizontal brown stripes and just doing a brown border around the outside...  What do you think?

Bye for now :)

Sunday, April 24, 2011

I need help...

You might recall that some time ago, I scored a table for $5 on eBay...  A while back Boofy took his sander to said table and it has since sat looking all forlorn in our garage, awaiting attention.

Today I got a bit motivated and thought about what sort of design I might like to put on the table.  I am hoping to use it in the toy room as Alex's new play/craft table.  The table he currently uses for this is inadequate, since his besties are twins and there are often 3 kids at a time playing or eating at it.  We don't let them eat in the toy room, we move it out of the toy room into the dining room, as the kidlets have been embracing the 'kids table' recently!  :)

Well, I am no painter, that is for certain - I recently painted some old bedside tables and no longer have use of the drawers.... they are painted shut!  Lol...  So it was never in this table's future to get a new paint job!  Then what do I plan to do, you might ask?  Many moons ago, when my friend Kylie's son (Brandon) was a tiny little boy, I procured a toy box and set about cutting up a wonderfully illustrated children's book (The Sign of the Seahorse by Graeme Base) to make him a mural on the top of it.  I pasted it all down with craft glue, then mixed up some craft glue with a little bit of water and painted it over the top as a sort of lacquer.  As far as I know, it lasted several years, so I thought I might try this again (note that I'd never done it prior to Brandon's toy box, and have not done it again since!)

So today, in an effort to get cracking, and keep my boy occupied at the same time, we sat down with paper, scissors and glue... and I drafted a design.  I know which papers I want to use for this project (since his toy room has a chocolate coloured lounge, and I plan to incorporate some green and orange in there when we finally get around to doing the whole thing up) so I decided to cut it out and paste the papers over the top of my rough design... and this is what I came up with...  Please pretend, while you're looking at it, that its actually the top of a coffee table you're looking at!  Lol


And this is where you come in.  I'm mostly happy with it, and obviously it is going to be much larger blocks of those patterns (since the table is considerably larger than an A4 sheet of paper) but I'm just not 100%.  Do you think it needs more chocolate brown to bring it all together?  Don't like the 'tiled' bits?  Any suggestions?  All feedback (good and bad) gratefully received!  Personally, I'm leaning towards a chocolate border right around the outside... (its a bit hard to see but those dark strips on it are actually chocolate, not black).  Thoughts?

Thanks friends :)

Friday, April 22, 2011

Very Good Friday Atlantic Salmon...

As I'm sure you're aware, traditionally fish is eaten on Good Friday.  A couple of weeks ago I went to the local seafood shop and paid a fortune for bought some nice pieces of Atlantic salmon which I then froze - I tend to eat this whenever Boofy barbecues himself a steak, so I usually buy about 8 pieces at a time.

Boofy is not much of a fish eater (in fact he almost never eats it) and he's not at all religious either, so I was surprised when he said he'd join me in a fish dinner on Good Friday.

We always do our salmon on the BBQ - its pretty easy, just spray the plate with spray cooking oil and then put the salmon skin side down on the plate.  Wait until you can see its cooked halfway through (or a bit less if you prefer your fish on the medium-rare side, which many do) and then turn it over.  Done!


Note: most people I know think we're crazy to cook fish straight on the BBQ plate as it will flavour meat that is subsequently cooked there... not true!  The trick to ridding the plate of all fishy residue, odour and taste is to clean it with white vinegar while its hot...  I promise you this works!  My mum told us about it, and we've never had a fishy piece of meat since!

So, back to dinner!  This is the easiest sauce in the world... just incredible!

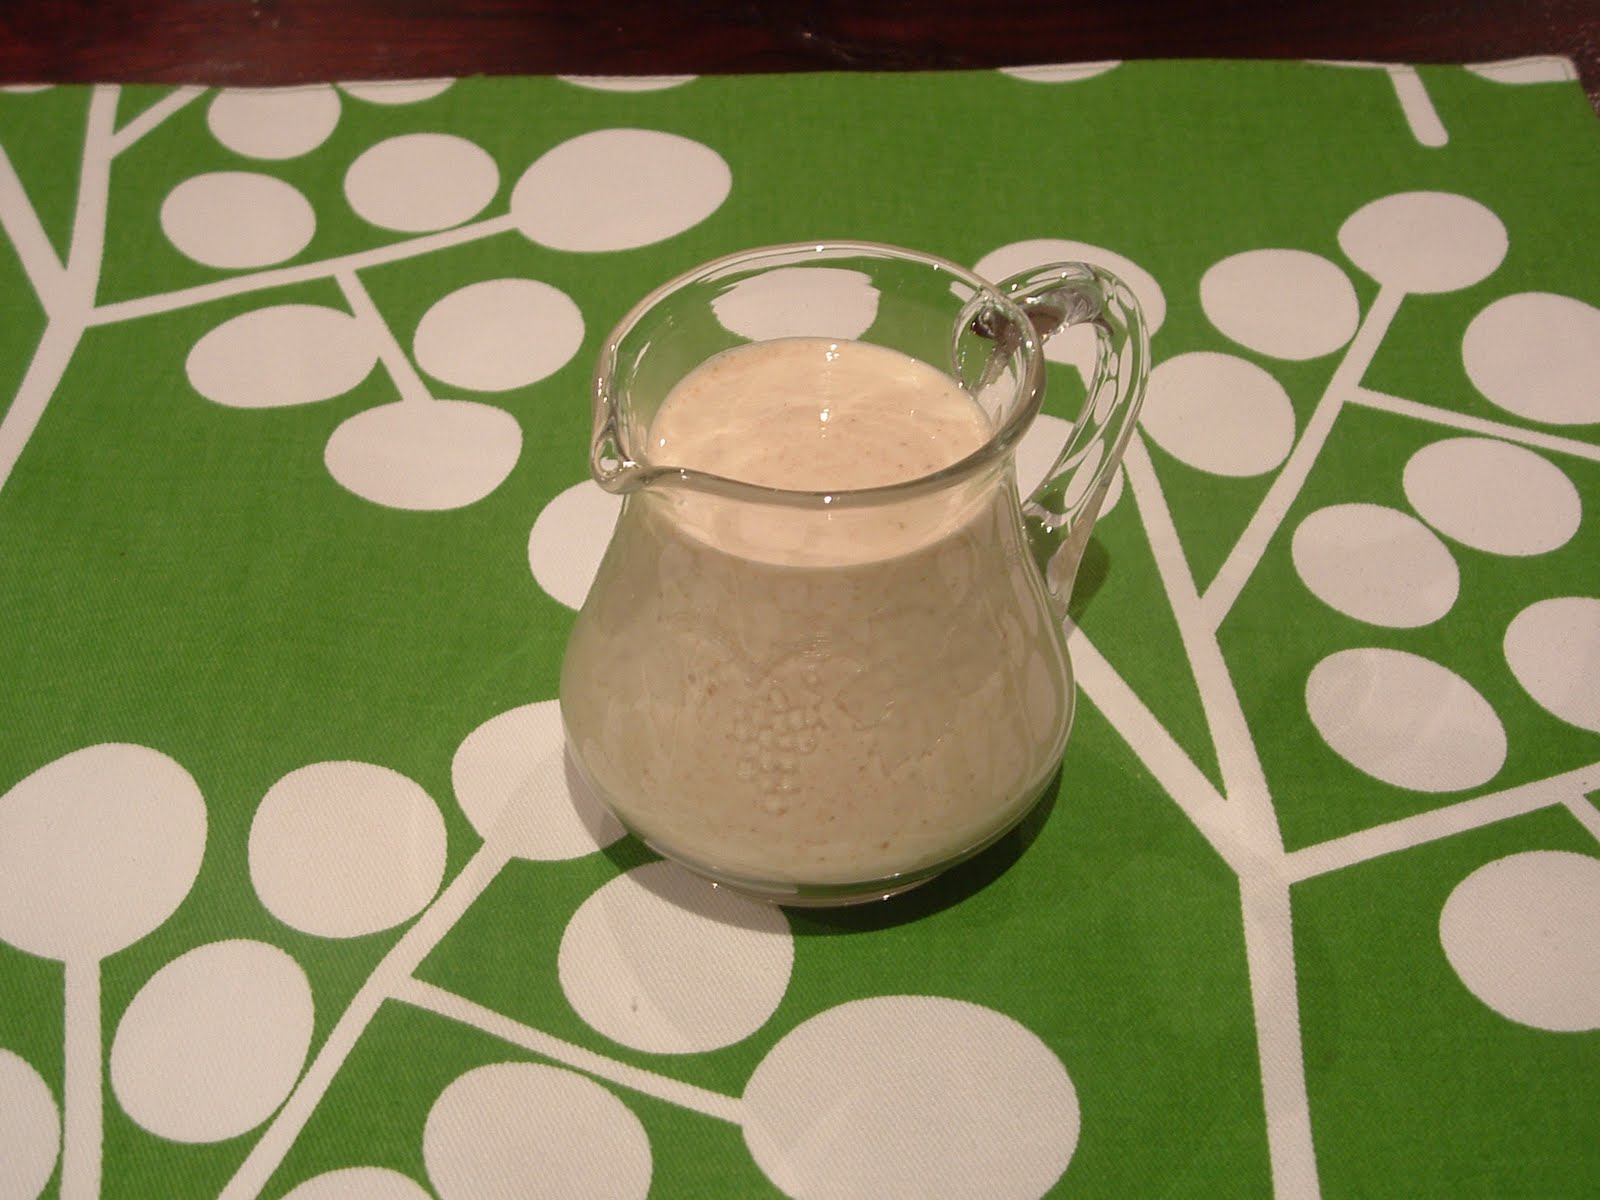
CREAMY CUMIN SAUCE

Ingredients
Thomy Mayonnaise
Ground cumin
Lemon squeeze

Method
Put a few good tablespoons of Thomy mayo in a jar.  Add a generous squirt of lemon squeeze for each tablespoon.  Put in a generous amount of ground cumin (more than you think you'd need).  Put the lid on the jar and mix it up til all combined.  Dip your finger in to taste and add more mayo if there's too much lemon/ cumin, more lemon if there isn't any bite, and more cumin if you think it lacks flavour.

Note: don't try this with your average Aussie mayo - our ones are much too sweet!  The European ones are not at all sweet, which really gives this sauce its flavour - it would be awful with a sweet mayo. 


If you were looking for a low fat version (because this is NOT a diet sauce!) you could do it with sour cream, but you need much less lemon juice.. it also doesn't taste nearly as nice - sometimes you've gotta be good, but my advice would be eat less of this one!! Lol

Once the fish is done, add some salad and plate it all up.  I really hate boring salads, so I always add as much as possible.  On this occasion I actually didn't think I really had much of a salad, but it turned out I had quite a bit.  Boofy wanted potato, but instead of serving it on the side, I boiled it, cooled it and put it in the salad, which tastes great, but does make the salad look a bit dull - you can see what I mean in the photo below - it takes that really crisp look off the salad.  Nevertheless, it still taste great.  So in this salad I had lettuce, parsley, Lebanese cucumber, mushrooms, sliced Spanish black olives, red capsicum, grape tomatoes, Spanish onion and potatoes.  I made waaay more than we needed, because its the weekend tomorrow and we have some left over chicken and ham, so this will be a lovely lunch for us Saturday and Sunday with cold meat :)  So without further ado... the salad:


I recently got a really wonderful compliment...  We had some friends over that we haven't seen for ages (hi Bec and Steve!)  It was a wonderful night, and we just had a casual BBQ, but when I served up the salad, Steve told me that he knew he could count on a good salad at our place - I was super chuffed :)  (Although my Mum still makes the best salads I've ever tasted... even her boring ones are better than anyone elses!)

Well I can tell you the whole meal was super tasty... this sauce is great on anything (even red meat).  Almost every time I put it on the table when we have guests over, they end up pouring it on everything!  And here is the amazing part - it has to be tasted to be believed, you will not believe how good it is for something so simple!!

By the way, Alex won't eat Atlantic salmon yet, so we gave him some fish nuggets with a hash brown (just done in the oven) and salad... not the healthiest meal but he rarely eats this type of thing, so I'm sure it won't kill him!  His dinner looked like this:


Yeah I know, it did nothing for me either, but he liked it, so I guess beauty really is in the eye of the beholder!

Bye for now :)

Easter Treasure Hunt...

It seems everywhere we look these days (in the world of Alex) they are doing something with maps...  Dora the Explorer's map sings a song about itself... and yesterday they even had a treasure map on Florrie's Dragons on ABC2.  So it seemed only fitting that the Easter bunny get into the swing and leave Alex a map on Easter Sunday to show him where the treasure is!

Well they are busy getting chocolates and such together at the Easter bunny's workshop, so he decided to hop on over and make the map at our place (more space to spread out!  Lol)  He called me in advance and asked me to get everything ready, I was very happy to oblige!  And as luck would have it, I found this Easter bonnet kit I bought last year (as a back up) for $4 - I felt sure he would find it very handy indeed!


I don't have any photos of him working, because he's very fast... but I managed to write down some details...  First he got hold of my A3 sized sketch book.  He then looked at our house and drew a loose outline of it on the sketch pad.  Then he just drew in some of the furniture, and put a big X in green and pink glitter glue where ever a special treat could be found!  Now bear in mind that the Easter bunny has paws, not hands, so he's not the best artist... and he is quite fatigued from all the Easter preparations which doesn't help his artistic abilities any!  But he gave it his best shot and here's what we ended up with (obviously its not to scale!)


And what do you know - that Easter bonnet kit did come in handy!  The Easter bunny made a wonderful likeness of himself on this cute little bucket for Alex to put his eggs in :)


Look at that cute little bunny bum!  Lol...  I think Alex will love going on his treasure hunt!

The Easter bunny told us he'll be back after Alex goes to sleep on Saturday night to put all his Easter eggs where the crosses are on the map... so we need to remember to leave the map out so he doesn't forget where to put them!  Hahaha...  He tells us he has all sorts of treasures for Alex, not just chocolate (phew!)  There's finger puppets, a book, pjs... and okay, maybe just a little bit of chocolate :)

Happy Easter everyone!

Easter Teacher Gifts...

Try saying that title three times quickly!!  Hahaha...  Well Easter is almost upon us - already!  (I know everyone always says this, but where has this year gone?) 

As with every holiday where gifts can be given, I needed to get together some gifts for Alex's teachers.  I have no idea who the teacher's assistant is in his room at the moment (it seems to change daily - and sometimes there isn't one if numbers are low) so this time I just needed to do one for his teacher, and one each for the owners (who are very good to Alex).

I thought about getting them something ready made - Bed Bath & Table have some beautiful Easter mugs, tea towels and decorations of all sorts...  But his sweet teacher, Kay, is very into making things where ever possible, so I felt I should honour that (somewhat) and make it a bit more personal.  Also I made a new years resolution to make as many gifts as possible this year.... and so far there have been a big, fat ZERO that fit that criteria (not so much as a card!), so I need to up my average a bit :)

With that in mind, I hit the local discount shop for goodies...  once there, I bought a pack of 5 plain white noodle boxes for a grand total of $2.00.  I had inventoried my supplies at home before I left and discovered that I had a hot glue gun (never used), craft glue, ribbon, a permanent marker and plenty of paintings and drawings done by Alex - this was all I needed!

As I said, I'd never used a glue gun before... so there were a few lessons learned on this one, but never mind.  I could go into great detail but actually, it was very quick and easy.... we're not talking rocket science here.  I basically just glued the ribbon in a line around the noodle boxes with the glue gun - the three main lessons I learned are these....  1.  be certain where you want to position it, because once you apply pressure, its not going anywhere!  2.  don't keep pumping and pumping the trigger if you're doing a small fiddly job - it will ooze slowly but if you keep pumping, it just squirts out a big lump which will go everywhere... which brings me to 3.  that glue is hot people!!!  if you end up with more than you bargained for and it gets on your hands, it can really burn!  (Who would've thought... with a name like 'hot glue gun'.... duh!  Well I have to learn everything the hard way, don't I!  Lol)

Anyway, the end result was a glued on ribbon strip all the way around the boxes...  it did not look very neat, but it does, very definitely, look hand made!  (Unfortunately it looks hand made by my 3 year old instead of me, but hopefully they won't call DOCS on me for giving my boy a hot glue gun!! Lol)  Here is how they looked at this stage:


After I had let the glue gun cool off, applied band aids to my hands and cleaned all the leaked strands and blobs of glue off everything, I set about the next task - labels.  I just got a painting that Alex recently brought home from Kindy and cut some little squares to fit the front of each box.  I then drew a rough border with a black permanent marker, and wrote "To Kay, Happy Easter, Love from Alex xxx" on the front.  Then I applied craft glue to the back and pasted it over the side of the box where the ribbon joined to conceal my clumsiness handiwork.  Then all that was left to do was fill it with a load of Cadbury chocolate eggs and seal it up.  And voila!


I also hit up my scrap booking stash again and put some Easter stickers I had hanging around on the top of the boxes to seal them - but I forgot to take photos of that bit!  D'oh!  Never mind, you can use your imaginations :)  Apologies for the blurry photos too...  I'm really not sure what happened there.

Stay tuned for more Easter fun soon - the Easter bunny has given me a sneak peak at what he's planning for Easter Sunday....  I'll be sharing that in the next couple of days!  I've been a bit sickly and run down lately, so I've been cooking a bit more often in an effort to eat some healthier foods and get myself back on track... the upside of this is that there are more recipes to come!  Boofy is also loving that he's been relieved of some of his cooking duties of late, although he's getting pretty sick of having to wait until I've taken photos of everything before he can eat!! Last night I was told I was 'out of control' with the cooked meal photos! Hahaha... 

Bye for now :)