Wednesday, January 26, 2011

honouring nanna's treasures - part one...

Before my Nanna passed away (which was a little over 2 years ago now) she passed onto me some of her most treasured homewares and told me the stories that went along with them.  Among them are her dinner set, silverware, a gorgeous set of pretty flower tea cups (which I have loved since I was just a little girl - occasionally I used to persuade Nanna to let me drink from them!  Lol), and her one and only 'true' antique (her words) - a tiny delftware plate.
Since we moved into this house, I have been looking for a place to put them that will honour what they meant to Nanna, and what they mean to me.  The obvious place to me is this cabinet which currently sits in our dining room:


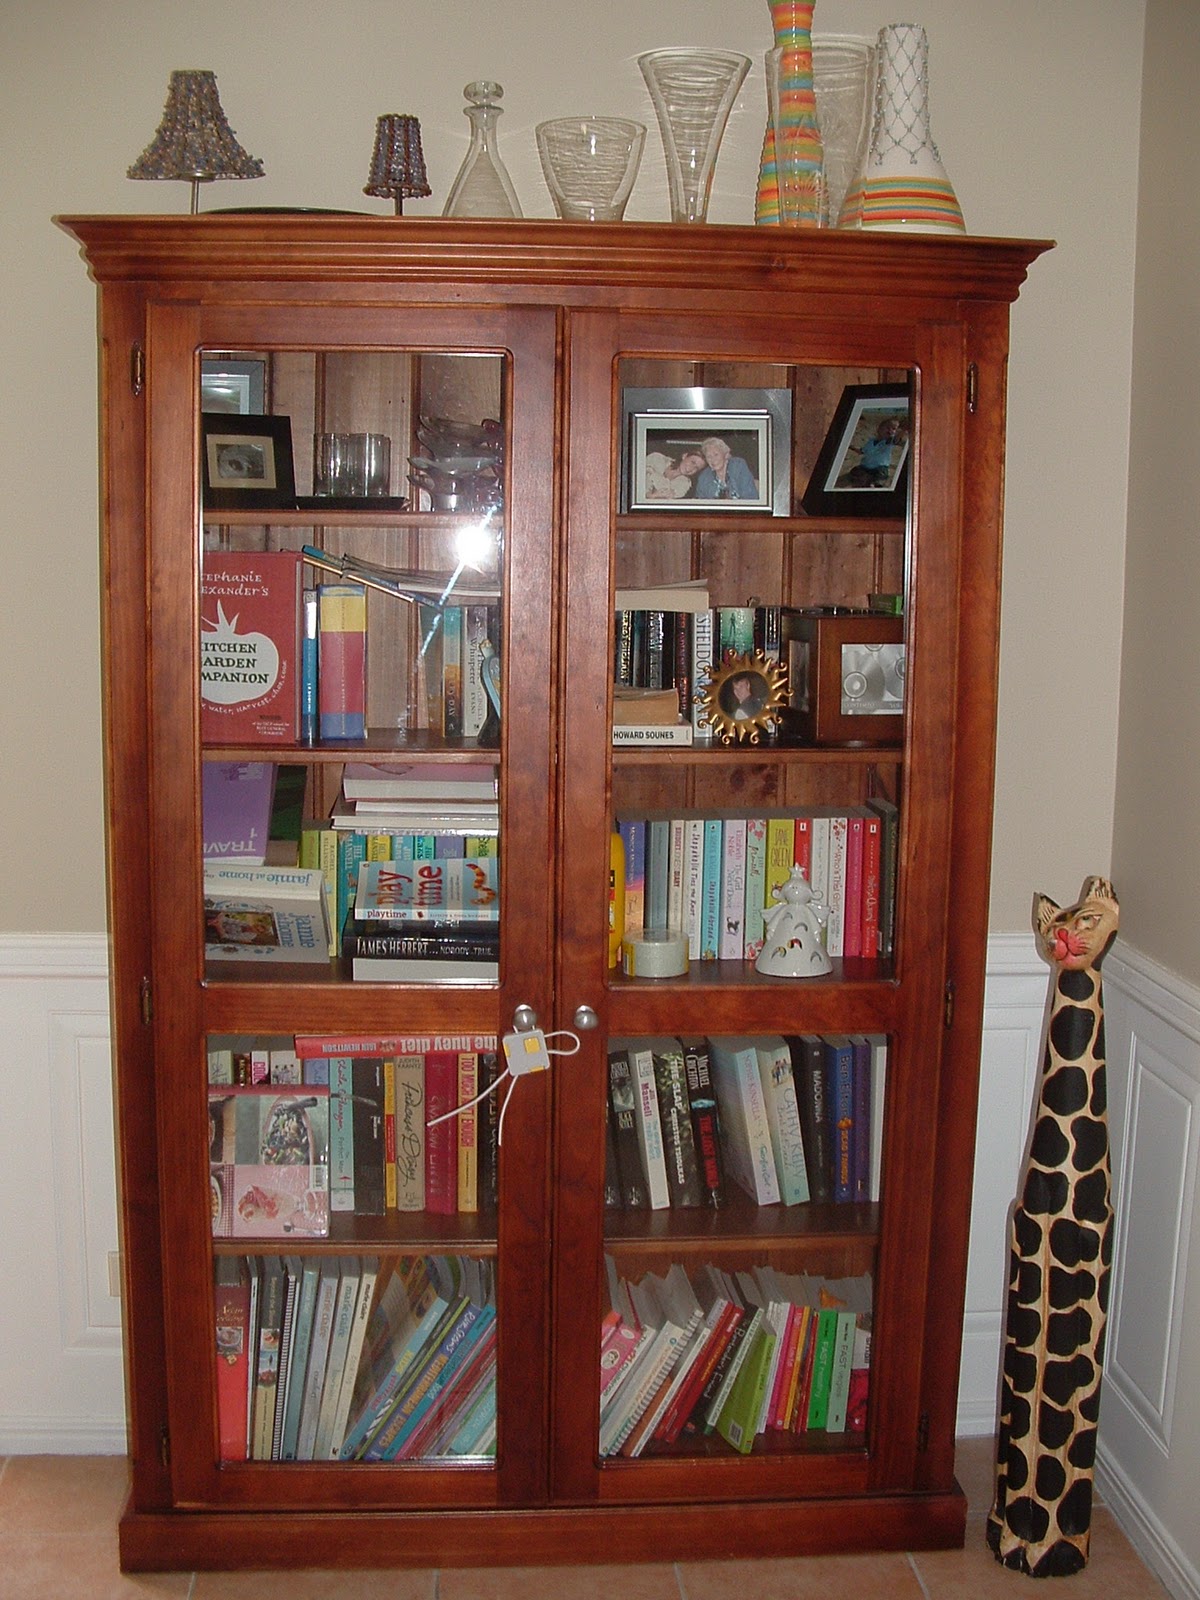
Looks like the ideal spot doesn't it?  Shame about it being packed to the rafters with books and other crap though!  So what's a girl to do?  Well, if you're anything like me, you will procrastinate for a year and mentally berate yourself for doing your Grandmother's treasures such a disservice, while doing nothing to actually physically rectify the situation!  Then, after a year or so, you'll start a blog which will get you motivated to actually do all those projects that have been hanging around for ages so you can post about them.... hooray for blogging!! :)

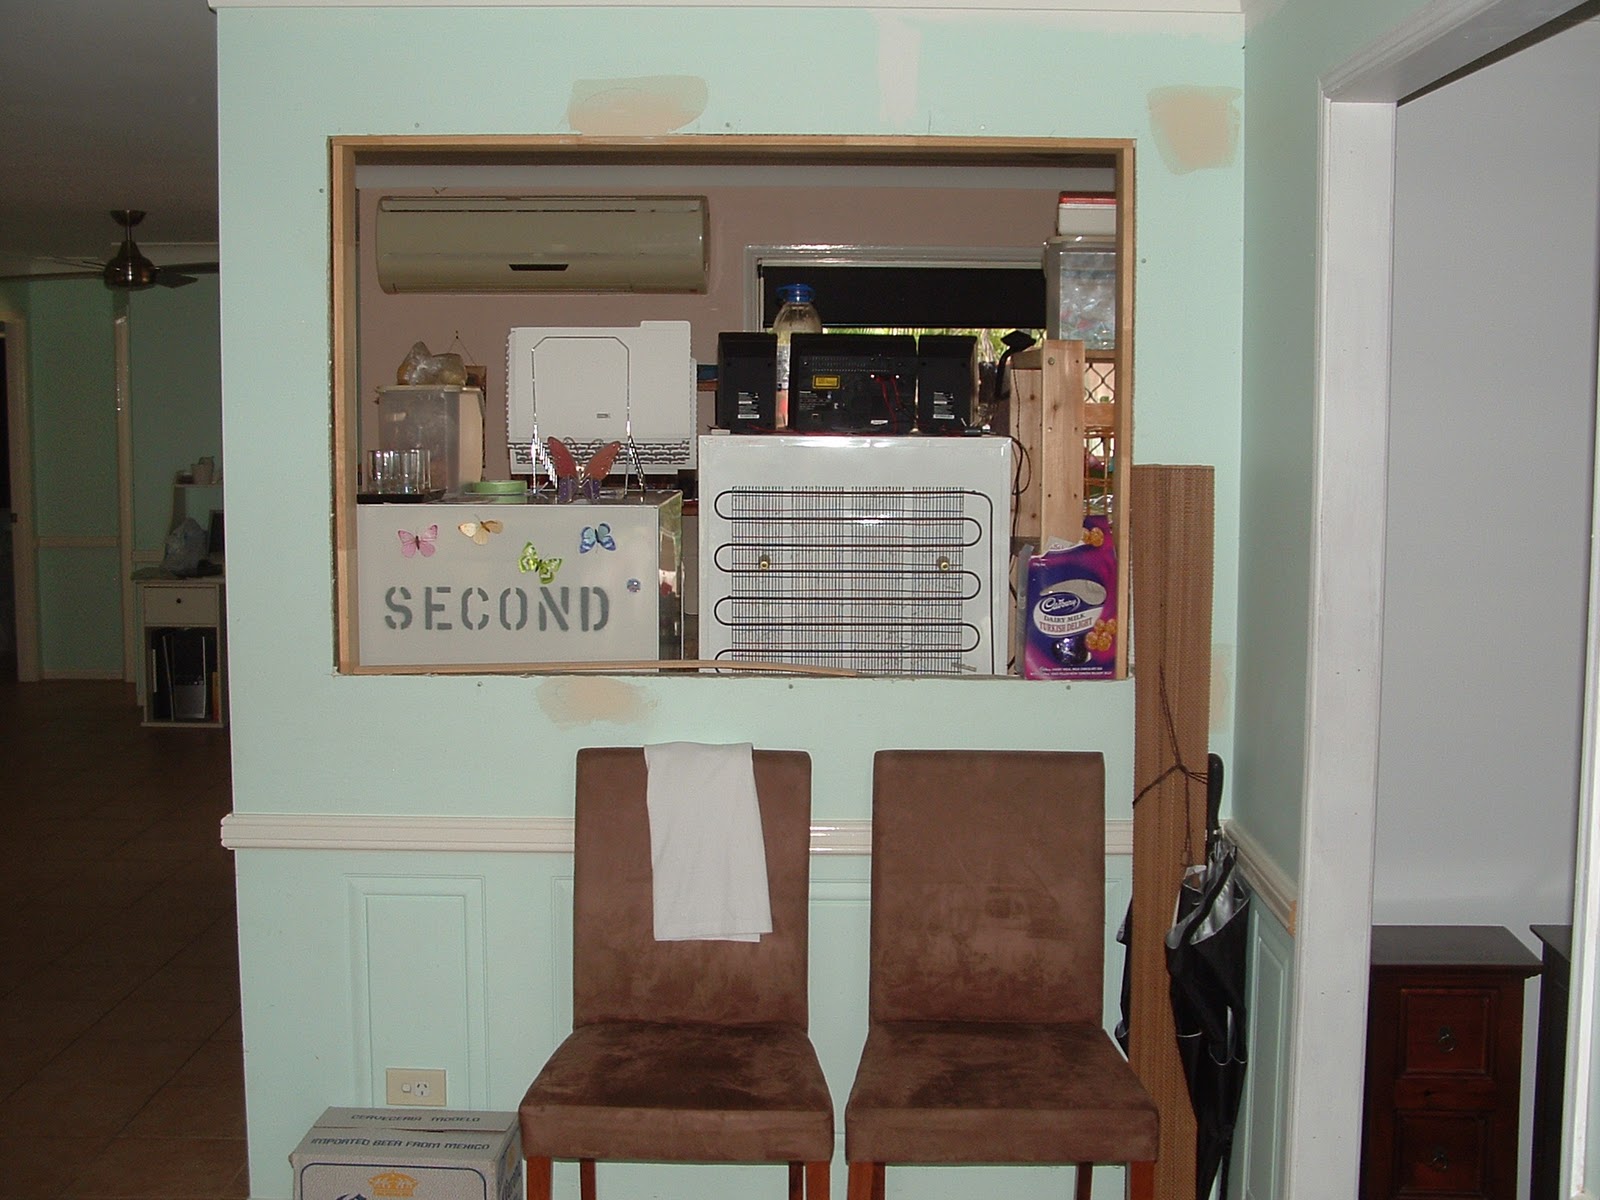
So that brings me back to the situation above - a cupboard full of books which I need to empty, and nowhere to put them.  Obviously we needed another bookshelf to move the books to, and the obvious place was a big vacant patch of wall near the back door, which sits between the guest bedroom and Alex's bedroom.  It has a couple of cupboards on one wall at the moment (which are desperate for both a good clean out and some lining on those translucent doors so you can't see the mess within, but that is a project for another day!) and one big free wall, to the left in the photo below.  (Don't mind that you can see where Boofy is currently up to with painting the living area! Lol... the aqua isn't staying!)


I had a brilliant plan to put in a low bookshelf and then do a big family tree on the wall above it similar to the one below - this one is in chef Guy Grossi's house and the image was from a feature Better Homes and Gardens did on his home - isn't it awesome??  I love it so much!!


(Image of Guy Grossi's house from Better Homes & Gardens TV show, Channel 7)

With that in mind, I went searching and it seems that these were my options.  The first (my preferred option) was from Super Amart - the Madang bookcase.  I liked it because it was the perfect height, and it was made of wood.  Everything from the kitchen back is white furniture, and our dining suite and cupboards up the other end are wood, so I thought the wood down that end as well would balance things out a bit.  It retails for $249.95, but when we enquired, the new delivery was apparently sold before it arrived, so it was going to be at least a month before we could get it home, and I'm just too impatient.  Truth be told, it was also more than we wanted to spend.  Nice though, isn't it....


(Image from Super Amart website)

So next was my second home, aka Ikea.  The Expedit shelving is always a good option (Super Amart also have a slightly more expensive but lesser quality version called Vault which we have in Alex's toyroom) so we definitely considered that also.  This is what I'm talking about, but imagine it tipped sideways, so its long and low:


(Image from Ikea website)

But even though this one is only $119, it still just wasn't really doing it for me... I realised it might hold all my books, but it wouldn't hold any magazines or anything decorative, there just wasn't room.  Back to square one.

So on a recent trip to Ikea with my friend Julie, we were checking out the shelving options and I was dismissing everything in sight, when we happened upon the Lerberg.  At $29.95 each I could buy two of them and still bring the whole thing in at under $60!  Amazing!  However, at 148cm tall, I couldn't have these bookshelves and my Guy Grossi inspired family tree... so I dismissed this option and kept going, leaving empty handed and commenting to Julie that I'd probably regret not buying them.

Sure enough, a week or so on, I'd looked in earnest and found nothing that was such good value and fitted so well.  So what did I do?  I gave up the dream of the family tree above the bookshelf, got in my car and hightailed it back to Ikea.  I bought two sets of white shelves (in flatpack of course) for my books - and what the hey, I bought two in charcoal as well for our outdoor area (more on that another time).  I came home and put those flatpacks together in record time, moved them into position and..... they didn't cover enough wall space, and wouldn't fit all that I wanted to add to them - d'oh!  So the very next day I hopped back in the car and went back for more sultanas another shelf.  Again I put it together and it joined its buddies - sooooo much better :)

Then came the fun task of transferring the contents of the glass cupboard onto my new shelves, and prettying them up a bit.  So after a whole afternoon of shifting books, here is the end result:


What do you think?  Even though it looks a little more cluttered than I'd probably like, I have to say I'm actually quite pleased with it.  And the whole thing still came in under $100 - woo hoo!!  And just as an aside - you see the little owl on the middle shelves?  Isn't she cute?  My stepmum, Heather, recently bought her for me and sent her up from Melbourne....  she's sitting with my Harry Potter books, I call her Hedwig - I'm nerdy like that!!! :)

And that brings me back to the glass cabinet which now sits empty, begging for some treasures to adorn its shelves....  I'd love to say I found a spare 6 hours to go through the boxes, wash all the contents and pack them lovingly into their new home, but it just didn't happen.  Plus I need to find some racks that will accommodate the various plates and platters of the dinner set - so that will have to be part two, I'm afraid.

I know I say this every post, but the photos really don't do it justice (still saving pennies for that new camera - will be for a while yet I think!)  One day someone with my dream camera will come to stay with us and I'll re-photograph everything... then you'll see our house's true colours!

Bye for now :)

Saturday, January 22, 2011

pimp my lounge...

Our lounge room was one of the first rooms to be made over when we moved in.  I've mentioned my bro, Mick, before and some work he's done around our house.  To put it in context, what actually happened was this.  My brother Michael is reeeaaaallly good at all that handy hands on stuff (that I suck at, and
Boofy wasn't great at at the time, but is getting better at by the day)...  When we moved in here, we had neither the time nor the expertise to change the things we wanted to change, and it was going to cost us a lot of money to hire all the different tradies that would need to complete all the different jobs (not to mention the amount of time coordinating them all, taking time off work to be here when they came, and then crying in frustration when they didn't turn up at said time!)  Mick was between jobs at the time, so we offered to pay his flights and pay him a wage to come up here (from Sydney) to do whatever he could get done in the almost-three-weeks that he stayed.  What Mick got done in that time was amazing, and if you continue to follow this blog you'll see heaps of his handywork!  So when I say Mick did this or Mick did that, you know the story behind it now :)

Well, back to the lounge.  So when the house was on the market, the lounge room looked like this:


Its hard to see all the details.... so let me fill you in.  This actually used to be a double garage....  The front door was originally located in our (now) dining room, but more on that later.  So the carpet was an old, cheap, stained synthetic loop style carpet complete with staples on the edges to cut your feet and did not cover the whole floor.  That little decorative patch of yellow near the front door is actually bare cement painted with paving paint - and in front of the window it was just bare cement, full stop.  The step up into the next room?  You got it, bare cement!  There was no trim around the windows, missing bits of skirting and cornices and a huge bare gyprock wall (not show in photo), not to mention all that patching and plastering we needed to cover, and the dreaded pale aqua paint that is all through this house!

So, firstly Mick set to work.  He put the trim around the windows, put on the required skirting and cornices and primed all that trim and the bare gyprock to within an inch of its life!  It sounds simple but there was soooo much to do in this room, it was a big job.  So after that Boofy got to getting some colour on those walls - half Dulux Self Destruct.  Truth be told, we went crazy and bought enough to paint the entire house in that colour (because we liked it) but I actually think its a bit warm... sssshhh, don't tell Boofy!  If I could do it again, I think I'd go with something that was a bit more gray.... something with green undertones rather than yellow.  However, my hubby has worked super hard on the paint job, and I'm very grateful, so I'm keeping my mouth shut and living with what we have! :)

After the painting was done, we looked into flooring.  It was going to cost us a fortune to tile or put down floor boards (my personal preference) so in the end we went for carpet (Boofy's personal preference - he likes a carpeted lounge) which was less than half the price of the other two options.  We opted for something hard wearing, good with stains and on special!  We figured Alex is still pretty young, so it will probably get a bit trashed and that's okay.  For the price we paid, we're fully prepared to replace it in 5 years when Alex is (hopefully) a little more careful!

We got our lounge on ebay a while back, when we were still living in our old place, and it fit perfectly in here.  Only problem for us was we have great expanses of wall to fill... it was going to cost us a fortune!  That's when I lucked out and found this bamboo screen in Vast Interior which would fill about 3.5 metres of wall for only $140!  Sold!  Check it out, it looks great with the lounge:


What to do on the other 7 or so metres of bare wall?  Fortunately I work for a large company which has its own intranet, complete with a Buy Swap and Sell section...  with thousands of employees someone is always selling something useful.  And that is where I picked up this cabinet, which I absolutely love, for a total bargain.  The photo doesn't do it justice and doesn't really convey the sheer size of the thing - its enormous and so heavy!  Its very useful too, all our DVDs are in the drawers.  Its the perfect size to line them, spine up, so we can see what they are at a glance. 

The metal tree on top was given to me by my Dad and Stepmum for Christmas (thanks Dad & Heather!) - it was something I spied when I last visited them in Melbourne, and Heather remembered :)  Come to think of it, the wooden discs on the right hand side were the same thing, I spied them in Melbourne and again Heather remembered!  Isn't that sweet?  And the candles on the left were bought by me in the same shop in Melbourne last time I was there....  (sidenote:  Dad and Heather live in this arty little suburb outside of Melbourne called Warrandyte.  City dwellers flock there on weekends to picnic by the Yarra, enjoy the great shops and cafes, and go the the awesome markets.  Its a really leafy beautiful little part of the world, and is .quite close to the Yarra Valley which is very handy!  I can't recall the name of  the particular shop that my metal art, candlesticks and wooden discs came from but hopefully Heather will fill me in and I can update this post - its an awesome shop.  It is so cheap, its really incredible!  If you're out that way and share my passion for homewares, you must check it out!)

Anyway, here is the cabinet!  (Ignore the green kiddies chairs I happened to have stacked in the corner when I took the photo!)


So everything was in.... but it was all looking very, well, beige!  It was wonderful over Christmas when everything was decorated, but now that its all put away, I was feeling a little depressed.  (Does anyone else get like that?  Like things are drab and boring once the Chrissy decs are all gone?  I get sad every year...)  Anyways, I'm not huge on colour, but I'm having a bit of a love affair with green and turquoise at the moment, and I found these cushions that were perfect!  The blue swirl one behind is from Far Pavilions and the colourful one in front is by Kas (I bought them from Samsara).  Aren't they gorgeous?


I was then lucky enough to find the same ones in a big floor cushion, which brightens up the bay window a bit, and is perfect since Alex likes to sit there and watch the world go by sometimes (or wait for visitors if he knows they're coming!)


I then put some candlesticks on one side table and a mirror photo frame with some capiz lotus flowers on the other side table.  For my big cabinet, I got these great glass candleholders, I put pebbles in the bottom and then just popped some tealights in them.  And a couple of fake Ikea plants for colour (I know, I'm a shocker... I never thought I'd have fake plants but I'm just in love with these ones, they just add some nice green and they're so cute... you will see them scattered around the house in many photos, lol!)  So now the cabinet looks like this - much better with a little bit of colour (photo doesn't really do it justice - I love my current camera but it is getting on and getting a bit outdated, we're saving for a digital SLR!)


And now the lounge area looks like this... heaps better with the colour in the cushions to cool it down a bit.


There are other things in the room that aren't in the photos, so you can't really see the whole thing (like the front door, my nanna's little old table and the tv cabinet) but one of these days I well get around to doing a video house tour so you can see it all and get more of an idea of the size of this room (its a huge room - the lounge itself is 4 metres wide so gives you an idea). 

Bye for now :)

Friday, January 21, 2011

$5 ebay score...

Its very likely you won't see what I see when you look at this coffee table!  Lol...  You see I've been on the lookout for a coffee table for a while (with a particular purpose in mind).  I'd been considering all sorts of Ikea and Super Amart options, when a week or so ago I saw this baby on ebay in a classified ad - asking price?  $5!  Tell me the last time you bought a piece of furniture for $5?!  I got waaaay excited...  I'm always reading blogs (mostly American ones) where the blogger picks up these horrendous little pieces for a couple of bucks only to turn it into something beyond your wildest dreams....  I wanna do that too but those bargains never seem to cross my path - until now!  Check this baby out:


I figured it looked like a fairly basic frame, so even if the top was irretrievable (which it very well might be) I could just unscrew it from the frame and buy a sheet of MDF for a new table top.  Well the original photo of course showed those marks you can see in the photo above.  The surface is only some sort of wooden laminate (or something along those lines) and table top itself is MDF or chipboard or something... I'm totally wowing you with my expertise in all things handy aren't I?  Lol...  never mind, knowledge is no match for enthusiasm!

So when I got this poor girl home and had a really good look... well.....


Lets just say that if they made Proactiv for tables, I'd be callin' up Guthy Renker faster than you could say Katy Perry!  This table has some serious scarring....  But since they don't make Proactiv for tables, its up to me to do some 'microdermabrasion' on this baby and see if I can get her looking youthful again!  (And if I can't, I'm afraid it will be new MDF - yes, a facelift of Joan Rivers proportions ladies and gents!)

And see the thing about this surface is that it doesn't have to be perfect, just reasonably straight.  Cos I'm going to cover it anyway... in what you say?  Well you'll have to wait and see....  what a tease I am!!  I'm hoping that this coffee table will go on to be the new play table in Alex's toy room (the one we have in there now is not cutting it as my boy grows and has his little pals over).

So hopefully I will get started on this over the weekend and won't leave you in suspense for too long!  And now that I've put this out into the big wide world for anyone to see, I really DO hope that enthusiasm will prevail over my lack of knowledge in the end...  wish me luck!! Lol

Bye for now :)

budget bathroom renos...

We have two bathrooms in our current house - the main one (which is tiny) and our ensuite.  We didn't want to do full on renovations as it would have probably cost us $10k or more for them both, so we decided to make the most changes we could within our budget.  In the end, the main bathroom ended up costing us around $700 and the ensuite cost us around $1300.  I'll give more explanation of what we changed below.

Here is a picture of what the main bathroom looked like before we moved in.  Be sure to notice, won't you, the peach coloured walls, gold shower frame with tinted doors, gold frame mirror, two tone (chrome and gold) tapware, raw pine shelf and wooden towel rails... 


I wasn't wild about the tile colour (being beige in the shower and vanity splashback and green on the floor (as well as a feature of green running through the shower).  The floor tiles were grouted with cement, so they looked dull also - but because of the cement, regrouting is a big job (as we found out in the ensuite) so we decided to live with those for now.  We are thinking we'll do a full reno on this bathroom in a couple of years and somehow incorporate the wasted space in the separate toilet next door.

So in the end we (and when I say we, I mean Boofy) painted the bathroom plain white to get rid of that horrible peach!  The next big thing we did was get rid of that ugly gold-framed shower screen - instead we installed a swing panel frameless one.  We had one of these at our last place and really loved it, and we loved how it opened up this room and made it look so much brighter!  We changed the old tapware with stuff we got fairly cheaply from Bunnings (fitted by my brother Mick who was here on a working visit) and replaced the old mirror with a budget silver-framed mirror.  Last to go was some horrible black plastic knobs on the vanity, which we replaced with sleek silver handles.  I then bought the bench from Ikea which gives good storage (the basket underneath holds Alex's bath toys) and a place for people to lay out their clean clothes while they're showering.
And this is the end result - so much lighter!


Now onto the ensuite (which is actually the opposite order in which we renovated them!)  This is what we started with....  features to point out are of course the same gold framed shower and mirror as the main bathroom, and same two tone tapware.  Also note the wooden toilet seat (which was also cracked) and wooden shelves, and of course lets not forget the peach walls :)


In the ensuite we did a little more than the main bathroom.  Firstly, we got the tiles regrouted.  The grout on the floor was dull (we later found out it was cement, which explained a lot) and the grout and silicone in the shower had holes and was dirty.  I found a local guy who was just starting out and agreed to do the whole bathroom for $300 (he eventually wished he'd never met us and I'm sure is considering a change in career now!)  So Shane set to work getting the old grout up only to discover, as I mentioned, that the grout on the floor was in fact cement - this posed a big problem since his tool for getting up the grout couldn't handle it, so he had to get it up out of the floor with an angle grinder.  Unfortunately for us, he didn't actually consider a lot beyond what he was doing in the bathroom, so no drop sheets, or even closing the door to the ensuite.... right outside our ensuite is our walk through wardrobe and of course the master bedroom, so I don't need to tell you what I came home to!  Luckily Mick was here and realised what was going on about 20 minutes into his angle grinding efforts, so he did his best to cover up what he could, but it was still VERY dusty and took us what felt like months to get rid of!

So regrouting finished, we powered on.  I bought a new vanity and got it delivered, only to realise the drawers were on the wrong side (and would clash with the plumbing) so had to take it back.  The store I got it from would only do credits, and all their vanities had the drawers on the wrong side for us, so what to do?  In the end, we spent our credit on a vanity top, a frameless bevelled-edge mirror and some flash tapware.  In between I also fell in love with a stone mosaic tile (same as the one in the kitchen splashback but little squares instead of stripes) which we decided could go above the existing vanity splashback.  Again, Mick the master handy man installed the vanity top, mosaic tiles, tapware and mirror.  (You'll have to excuse my photos, obviously I don't have the wide-angled lens that the photographer had!)


We bought a kit with a new cistern and toilet seat and Mick also installed those in both the ensuite toilet and the main one.  I bought some glass and chrome shelves from Bunnings and put two above the toilet, and one inside the shower (which looks great and is fantastic storage).


And the last thing we did was rip down the horrible ugly gold framed shower screen and get ourselves a new semi-frameless one...  what a huge difference!  The photo doesn't really do it justice, but you get the idea :)


So there you go!  Bathroom renos on a budget.  The tiles in the bathrooms are definitely not what I'd choose if I got to redo the whole thing again (neither are the vanities) but they look clean and much more modern now, so we're pretty happy with them for the time being!

Bye for now :)

Tuesday, January 18, 2011

would the real slim shady please stand up...


Okay if you're one of those people who find looking at photos of other people's kids insufferably boring, now is definitely the time to skip to the next post!! Lol... For anyone who is still there, I thought I'd just share some photos of Alex from a recent photoshoot…. He's such a cheeky monkey!  Of course only the 'nice' ones from this shoot made it into the rellies' Christmas stockings last year, but just so you can see the REAL Alex, here are some images for your viewing pleasure :)


Bye for now :)

Sunday, January 16, 2011

kitchen after...

Well as promised, here are the kitchen afters :)  The walls weren't painted yet in these photos, and the floor still needed tiling, so we had a jute rug down - but more on those in another post!  Here's our (almost) finished product:

We bought a new fridge but were able to save some money by using the same appliances (since they were all still in good condition).


 And this is the view over our new big bench, with servery wall gone, into the lounge and dining rooms (don't mind the fridges in the dining room or the hideous paintwork - all gone now!)

I found the feature tile in the splash back and just feel in love - its a mixture of matte and gloss glass tiles with stones inlaid in some of them.  We have the same ones in our ensuite but little square mosaics instead of long ones.  We chose the large 600 x 300 ivory tiles to go with them - not my choice, but I was outvoted by Boofy and my Mum (and the ones I wanted weren't available when the tiler was anyway, so I guess they weren't meant to be!)  But these ones look good.

So there you have it - kitchen renovation all but over!  I'll share the details of the flooring in another post, since it ended up being quite the juggling act!  Let me know if you'd like me to do a post with pictures of all the inside kitchen features (pull out pantry drawers, le mans, under sink bin, 900 wide drawers etc) - if so, I'll have a clean up and take some shots!

Bye for now :)

kitchen before...

By far the biggest project we've undertaken in this house has been our kitchen!  When we moved in, we had a mish mash of cabinets, some tiled floor, some bare concrete, a cook top that slid around on the bench top, half a splash back... well the list goes on!  Anyway, here are some before photos so you can see for yourself! This is what the kitchen looked like when the house was on the market - bear in mind these are professional photos so it actually looks better and a lot bigger than it appeared in person (also it was open for inspection, so of course the previous owners obeyed the cardinal rule for selling your house - get rid of all clutter!)


And at a different angle taking in the back part of the house and back door:


But flattering photography aside, you can still see the bare gyprock, missing cornices and skirting, and the bare cement on part of the floor (there used to be a doorway there into the laundry which the previous owners blocked up) the green bench tops and yellow cupboards... nice!  Just above the fridge you can also see the servery window the previous owners cut out but didn't finish off, which afforded a magnificent view of the back of the fridge from the dining room!

I feel like I need to say, just to be fair to the previous owners, that they did not choose this decor (it was inherited) and they had started some great renovation work before they needed to sell - it was just very much mid-renovation.

In any case, we bought the house and moved in.  The kitchen didn't have a dishwasher so the very first thing we did was have one installed.  The second thing we did was getting a cabinet maker we knew of to put a door on the kitchen (since Alex was not quite 2 at that time).  We quickly discovered that the previous owners must have packed up their whole kitchen and lived on take away while the house was on the market, because there was next to no storage in the kitchen!  To remedy this (and because we knew we weren't keeping the kitchen, just putting in interim solutions until we did a full reno)  we hung some very ugly shelves in the corner on the wall (we found them in the garage), put in a plastic set of drawers and wooden shelving unit to tide us over.  So here is the chaos that was our kitchen after our family came to town!


In the photo below here you can see the top of the servery that the previous owners cut out which looked through to the dining room.... great idea in theory however there was nowhere else in the kitchen to put the fridge and freezer!

So we ended up with a view of the back of them when looking back towards the kitchen from the dining room.... tres chic, non?

We actually survived 5 long months with this makeshift kitchen before Kitchen Connection  came to transform it for us.  (We'd looked at a couple of other companies,  a local cabinet maker and even Ikea kitchens but in the end we liked the design and found it great that they would coordinate all the tradespeople to do the work at once, so less stress for us).

We decided we wanted to lose the wall with the servery in it and have a big long bench there - they were totally obliging.  We also didn't want a corner pantry, we wanted high cupboards along the back wall and then cupboards underneath.  On the left had side in the corner we put a 2 tier lazy susan.  On the right hand side in the corner we put a le mans (you can see it here if you scroll through the images).  On the bench top on the left hand side we wanted an appliance nook with a roller door.  We wanted the oven in the wall (rather than under bench), big slide out drawers in the pantry, and large drawers for our dishes also.  And they were able to incorporate it all - yippee!

So after signing our life away, emptying our bank account and a couple of days with no kitchen (that's really all it took - not long at all) we got our dream kitchen!  I've put the kitchen afters in a new post as it seems to take too long to load if I do it all together, so you'll have to read the next post to see the afters, hee hee hee!

Bye for now :)

Saturday, January 15, 2011

hello... tap tap... is this thing on?

Well hi and welcome!  If you're reading this, then you've found my blog!  Well (obviously) today is my first day of blogging.  I'm hoping I'll be able to share lots of things about the progress of our home renovation, our family life and the strange things that pop into my head!  Mostly I think this blog will be read by friends and family, but just in case you are a complete stranger who has happened upon my blog page....want to know some things about me?  I'll assume that 'ummm....' is a yes! 

Here is a recent portrait picture of our little family:


Well first off, my husband Tim (affectionately known as Boofy)  and I have been married since 2002 and we have a 3 year old son, Alex.  We bought our current home about a year ago and have been feverishly renovating ever since (it was a case of 'Renovation... Interrupted!' when we bought, so there was much to do).  It was missing some floor coverings, skirting, cornices, taste, bits of walls... but had great bones!  We're having a ball watching it transform from ugly duckling to beautiful swan.

My first love is of course my family - my fantastic husband and my son who is the most adorable kid I've ever met (biased?  me?  no way....)  Seriously he says the funniest things... are all 3 year olds so funny?  Don't get me wrong, life isn't all fluff and fun... of course he has his cheeky, devlish side, but mostly he's just gorgeous :)

That aside, another thing you never needed to know about me is that I have an unnatural obsession with homewares.... seriously, I drool over them in catalogues, in magazines, on websites, on blogs, in books... well, you get the picture!  I just love them... really... but when it comes time to actually purchasing them, I'm often paralysed with indecision...  Actually that's not entirely true... I would describe my shopping style as 'bi-polar'...  I'm either a master procrastinator or the impulse queen....  Its shameful how many impulse-purchases-gone-wrong I've taken back or just had to live with over the years!  But then there are other things I have coveted for months, and when they come on sale (and are therefore in my price range) I just can't bring myself to take it up to the register and actually buy it!  (I've loved it and looked at it for so long... could it really be mine?  Am I sick of it now?  If its on sale because its the end of season, what if the new range stock is something even better, and then I've bought this one and have to start saving all over again?  You see where this is going... a frightening insight into my brain for you!)

Besides homewares (and my family) the next two things on my list of best ways to spend a day, if I'm not totally exhausted from work and being a Mum, are cooking and crafting.  Craft is more of a pipe dream these days...  I have a sewing machine but can't sew, I love to scrapbook but have not made time for it since before my son was born, I love to make things (anything really) but it never seems to be a priority...  People have told me for years I'm a bit creative, but I sometimes lack that push I need to just get in and get started...  (Enter procrastination again - this is a common theme in the world of me... the mortal enemy of someone with an active mind...  too many ideas, not enough action!)  And the cooking thing... well...  I used to spend all day cooking feasts for my friends...  I loved to cook beautiful fresh food, sit with friends and family, and enjoy the fruits (or salads) of my labour with a few glasses of wine.  But since I had Alex, I rarely cook something that doesn't involve some sort of pre-prepared element or come from a recipe that has the words 'quick and easy' in front of it (Nigella Express has featured heavily!)  Any if I'm totally honest, my husband probably cooks the majority of our weeknight meals now.  Still, if we are entertaining I do tend to take over the cooking...  and occassionally I still pull out the big guns, so I'm sure I'll get right back to it at some stage when life is a little less hectic :)  And in terms of this blog, if you love a recipe, never fear.... not actually making the meals hasn't diminished my zest (pun intended) for recipes and cookbooks (esp really pretty ones!!) so I'll still be sharing lots of recipes - everything from express weeknight meals to full on dinner parties (depending on your preference).  And don't worry, I'm no expert, so nothing too technical, just good fresh, simple food that appeals to most..  I particularly love Asian food.  Delish!

Well I think I have bored you rambled long enough!  I'm hoping I'll be back to blog again and not just relegate this to the 'started but can't be bothered finishing' pile like so many of my other brilliant ideas!  If I do come back, I hope I'll see you then :)

Bye for now